I became a member of the online Model Car List in late 1998. In the fall of 2002 we decided to do a group build based on the AMT 1949 Mercury Coupe kit. Although I normally build showroom stock, the idea of a full custom '49 Merc intrigued me. So I decided to pull out all the stops and do a radical custom using skills I had developed over many years of building.
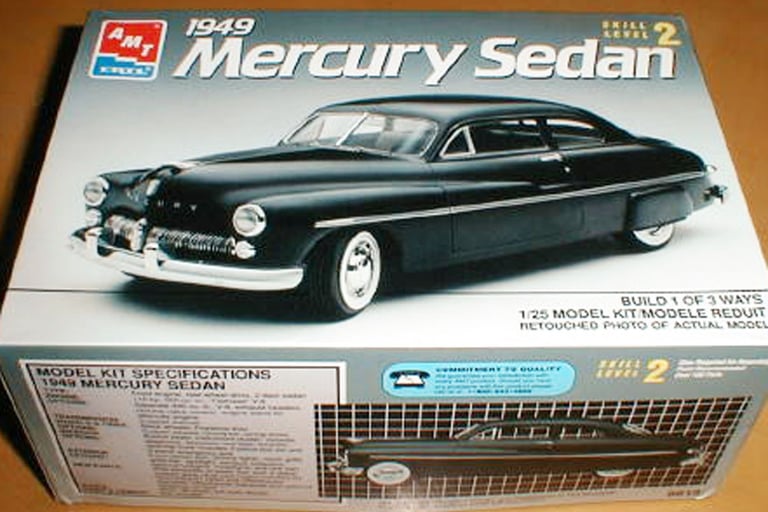
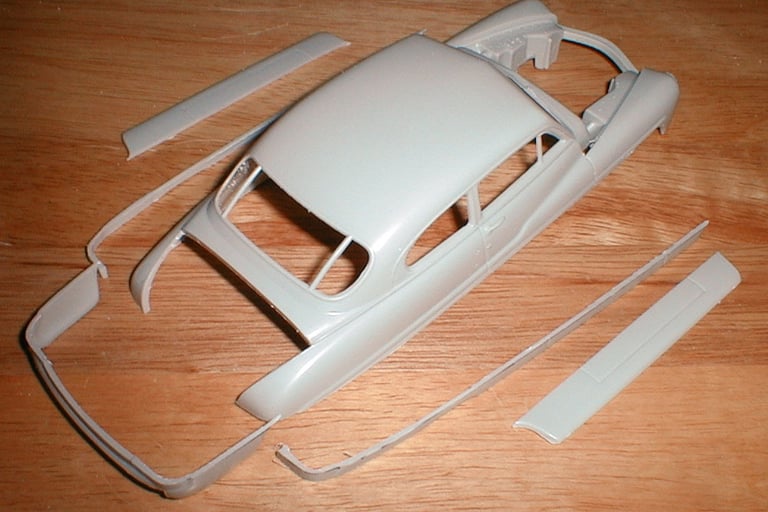
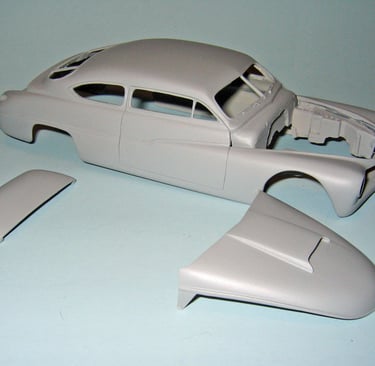
AMT's '49 Mercury was first released in the early 60s. It has been reissued a number of times.
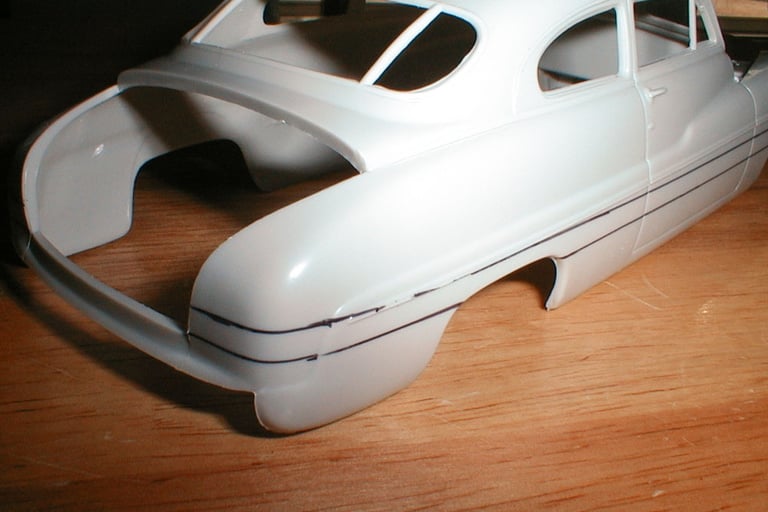
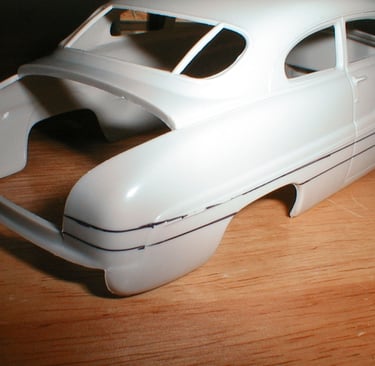
The first thing was to section the body a scale four inches. I started by marking the cut lines.
Using a razor saw, I cut along the lines. Here is the result. The two thin strips adjacent to the body were discarded.
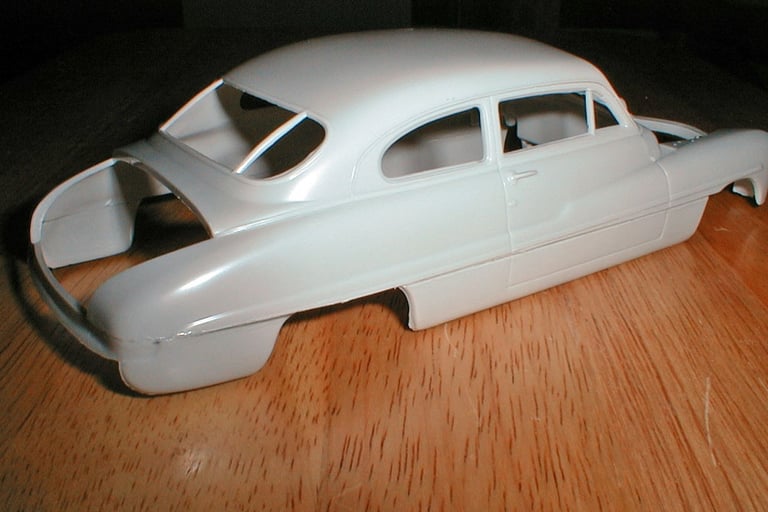
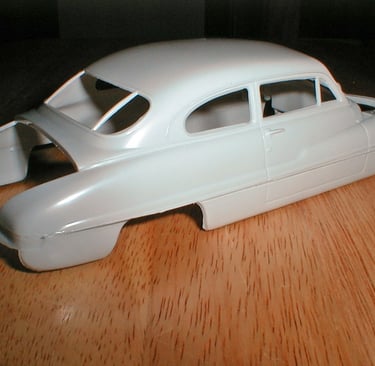
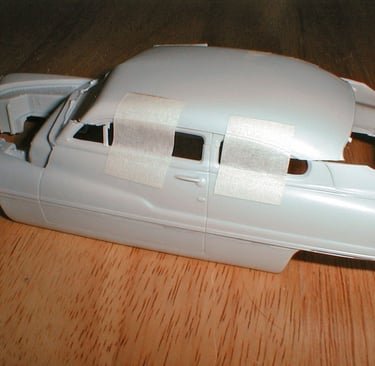
Here's the body, glued back together. I held everything together on the inside with masking tape while the cement cured.
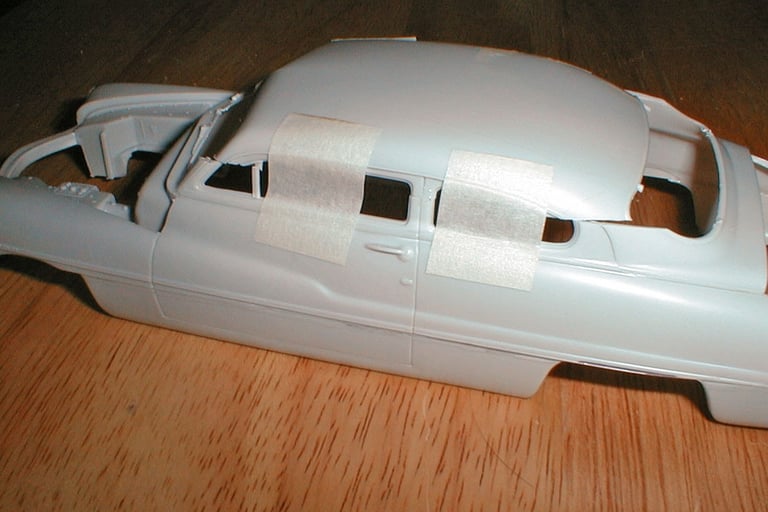
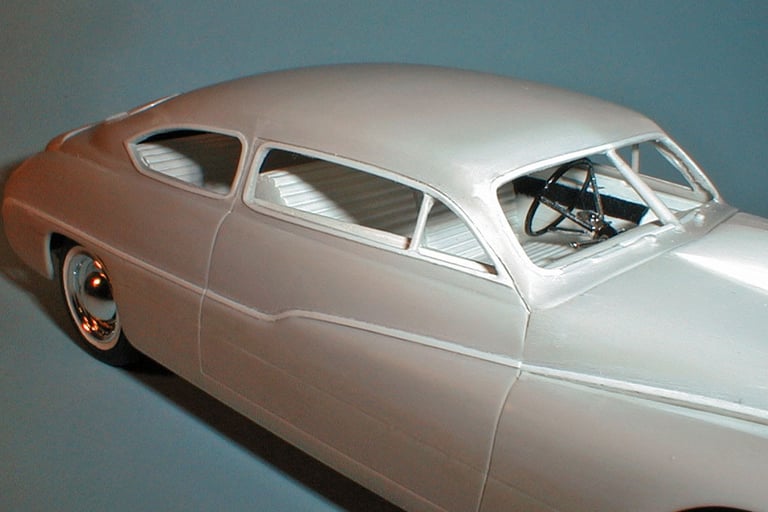
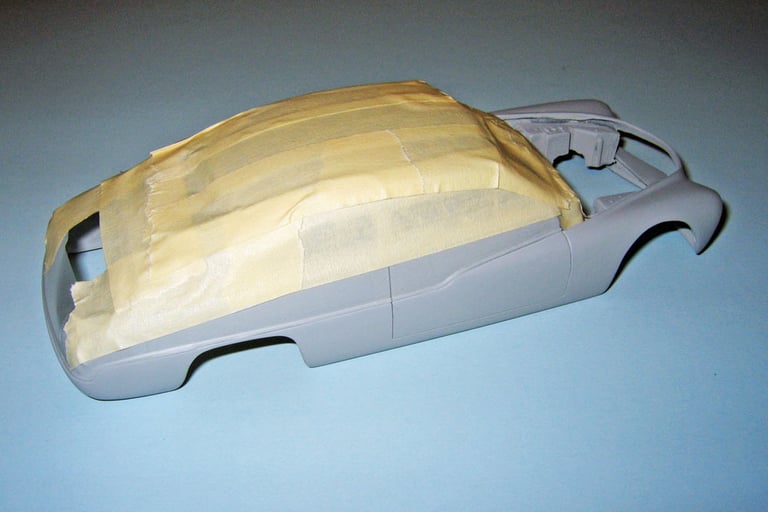
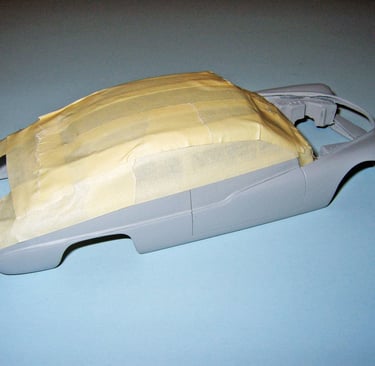
Next came the top chop. I marked off cut lines and removed a scale three inches. Then I cemented the top back to the body and again held it in place with masking tape.
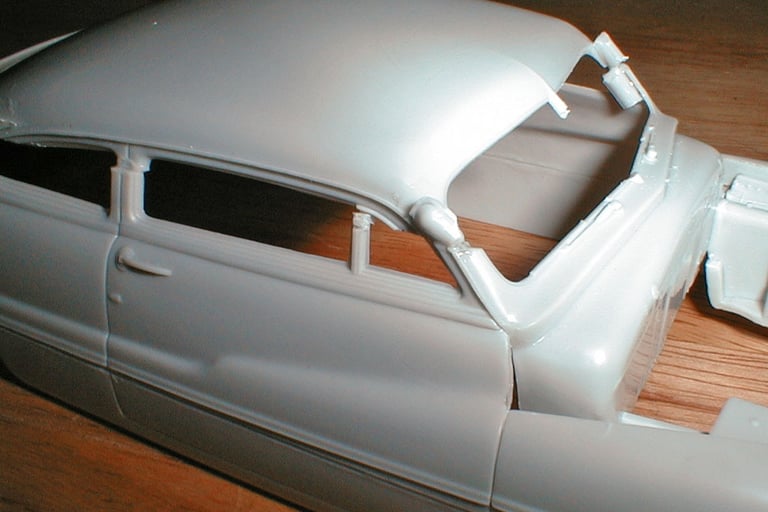
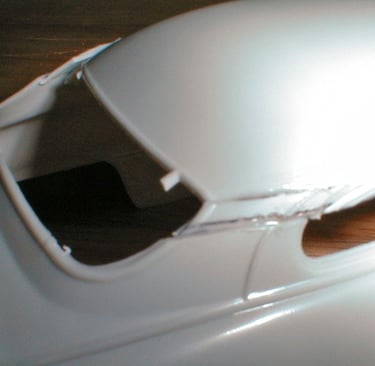
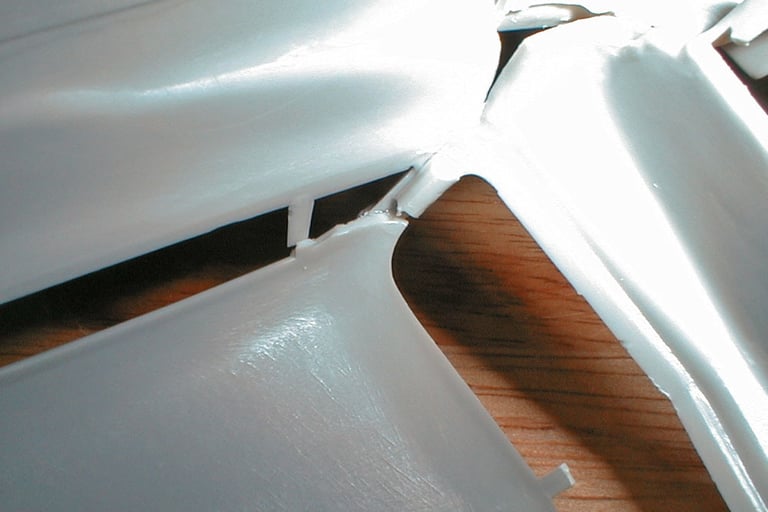
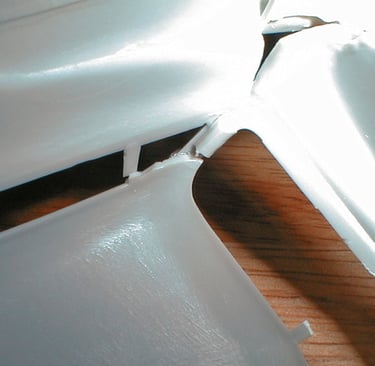
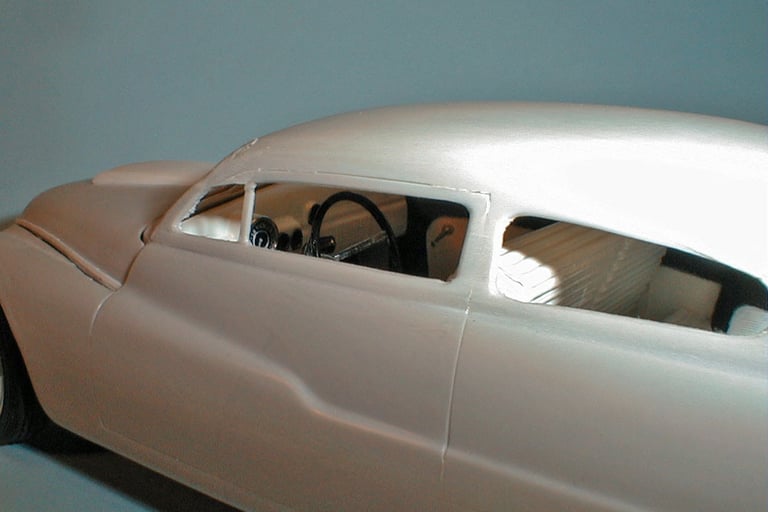
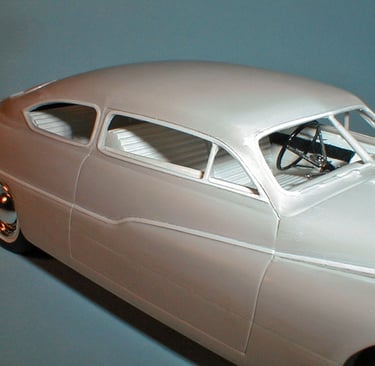
A top with one or more curves, like the '49 Merc is complex to chop. I lined up the center posts and let everything else fall into place. I wanted the windshield posts to be very strong, so I glued pieces of sprue in place for added strength.
At the rear, I glued the pieces that had been removed over the upper edge of the cut to help fill the gap between the upper and lower sections of the top that were caused by the curve of the top.
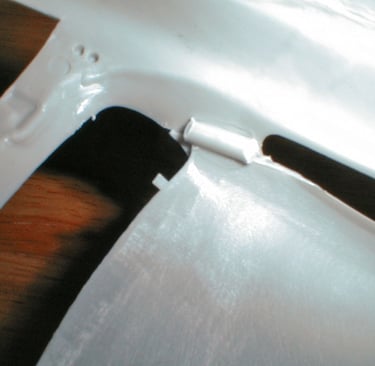
Sprue was glued to the windshield posts from the inside...
...and also across the cut line at the rear.
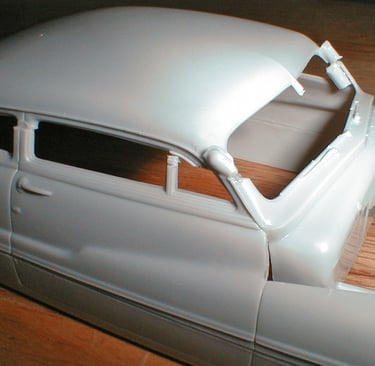
Everything's glued in place. Time to start laying on the filler.
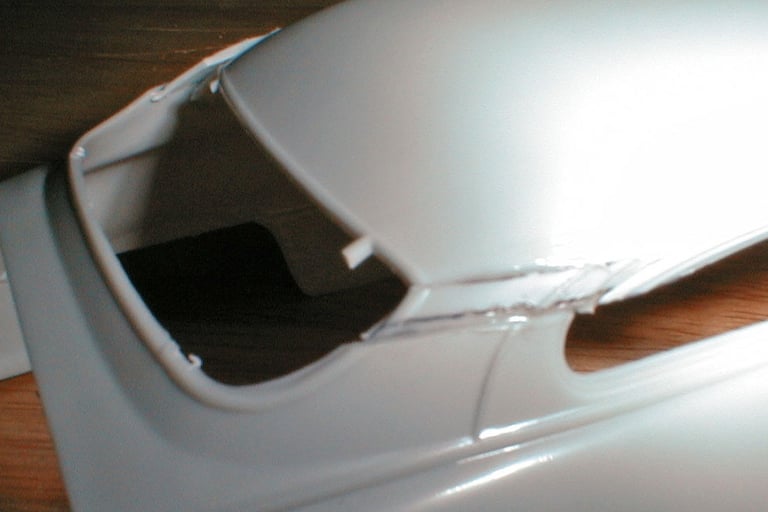
This shows the early stages of filling and smoothing on the chopped top. The sectioning cuts have also been filled and smoothed.
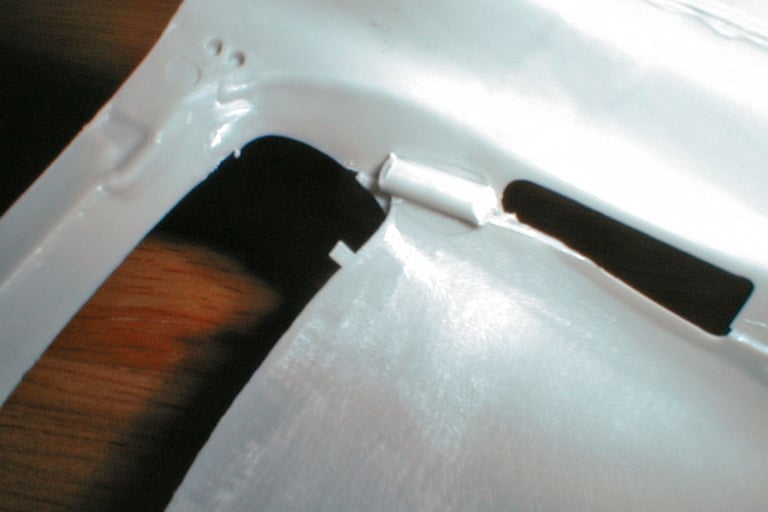
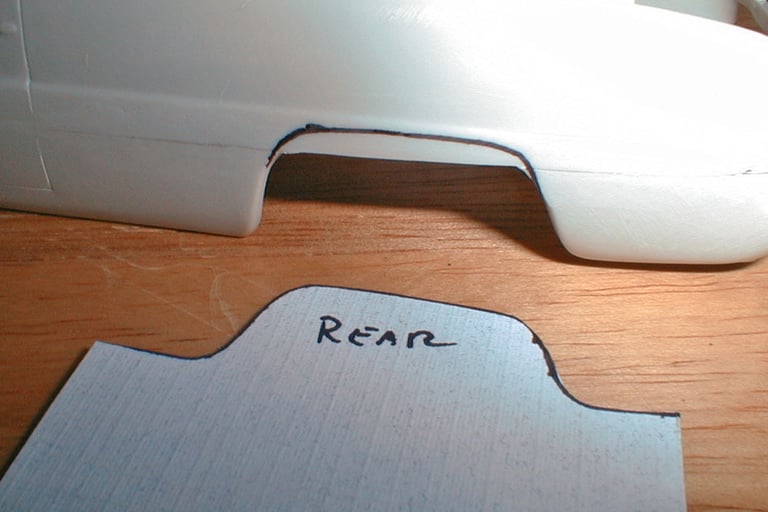
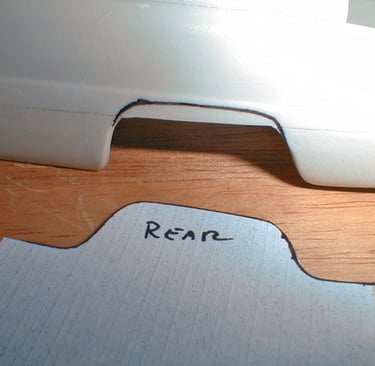
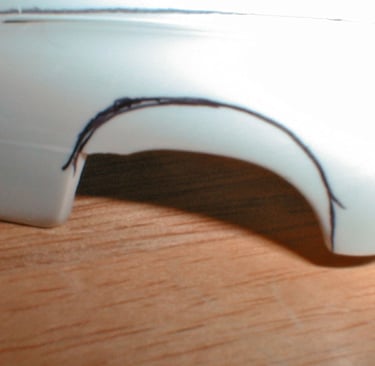
I wanted to radius the rear wheel openings. I started with a pattern to keep thing symmetrical and then marked the areas to be removed on both sides.
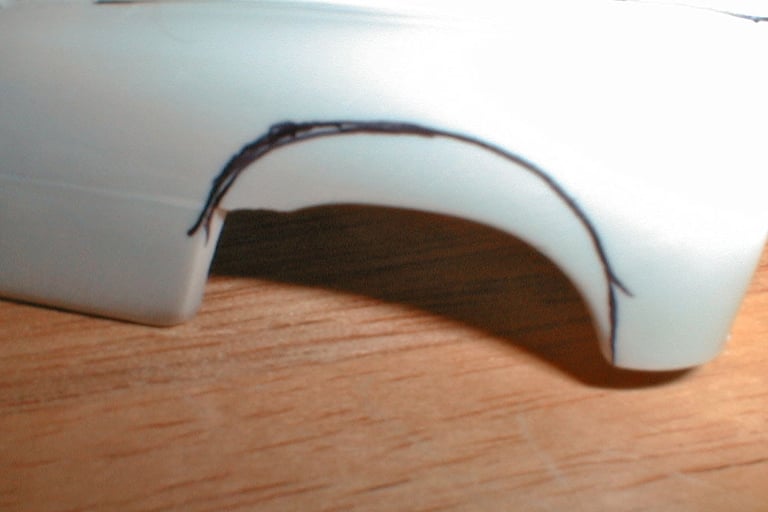
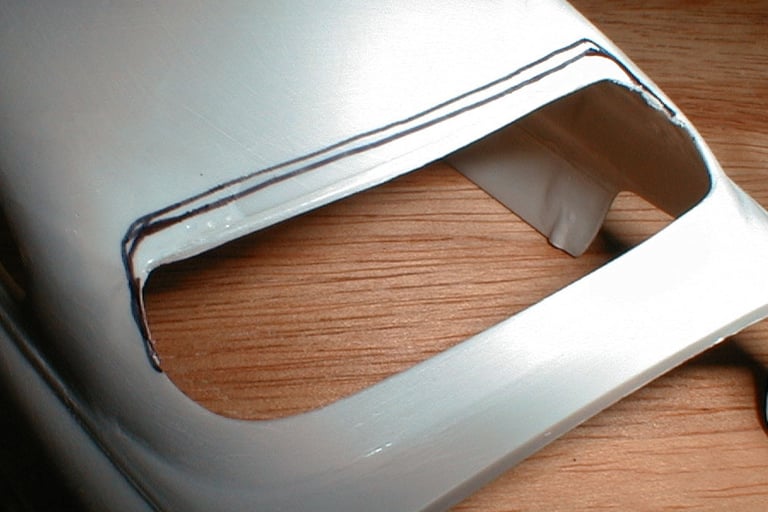
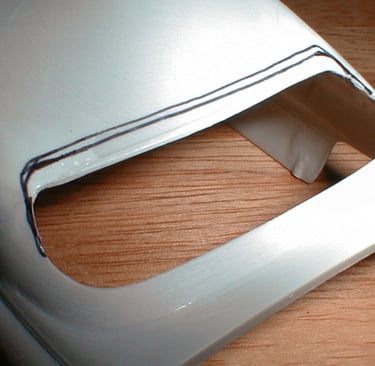
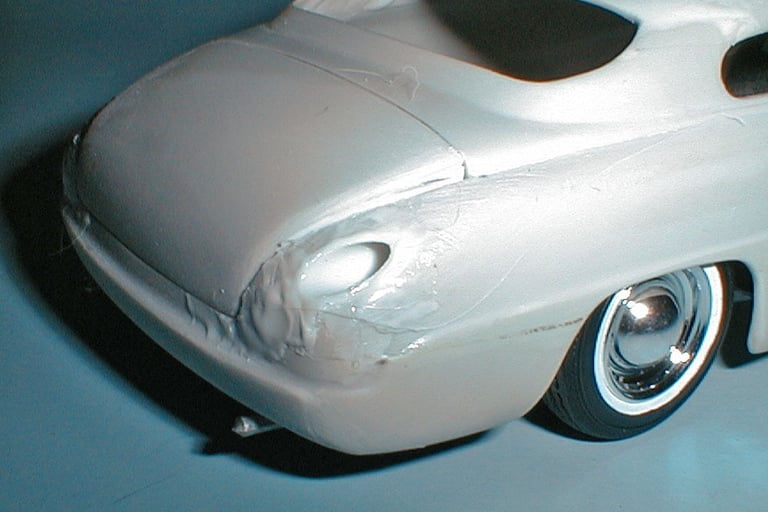
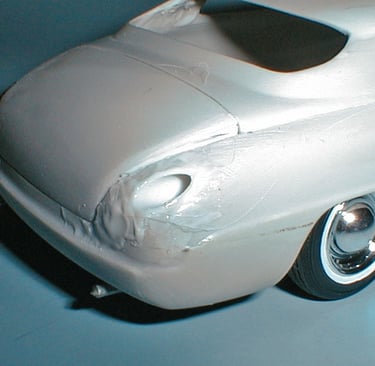
The front wheel openings also had to be enlarged for both appearance sake and to clear the front tires.
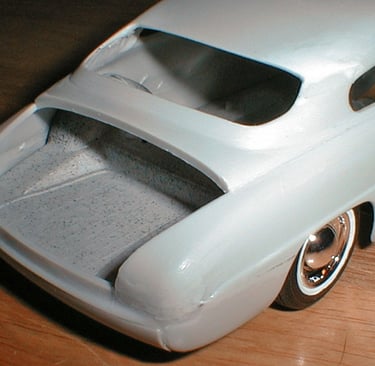
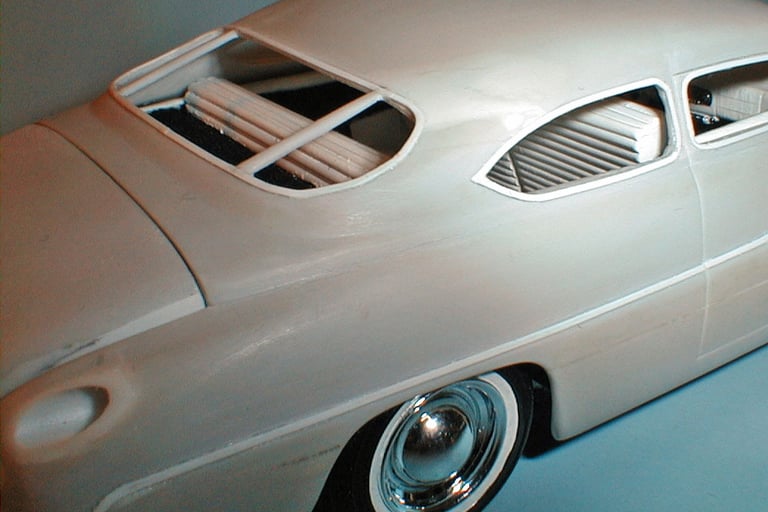
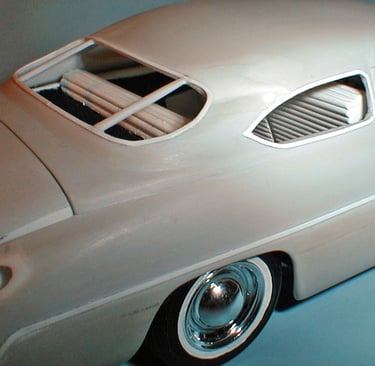
The rear window was enlarged by removing the area shown.
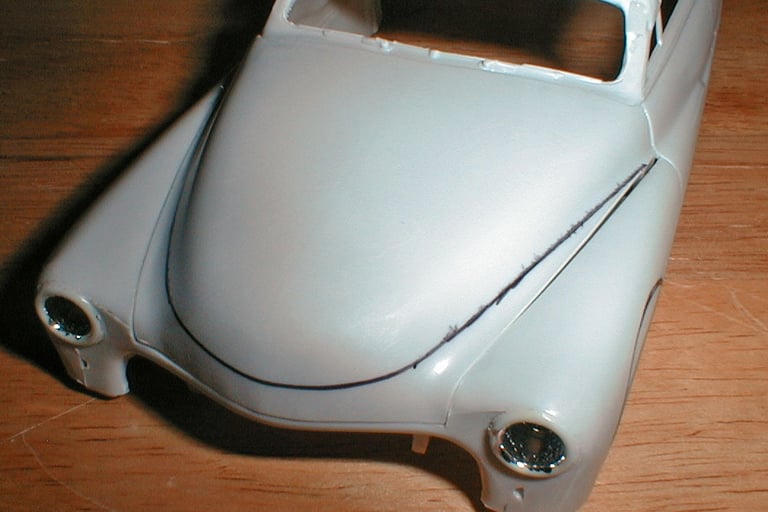
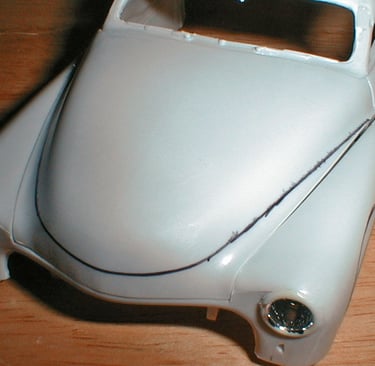
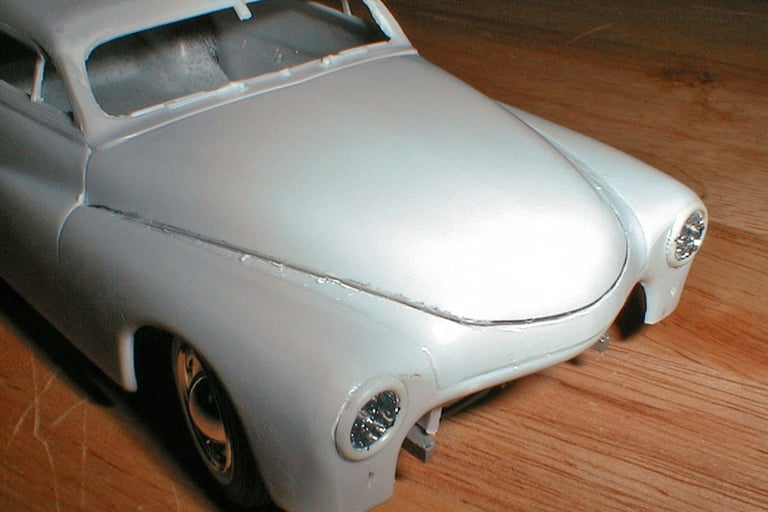
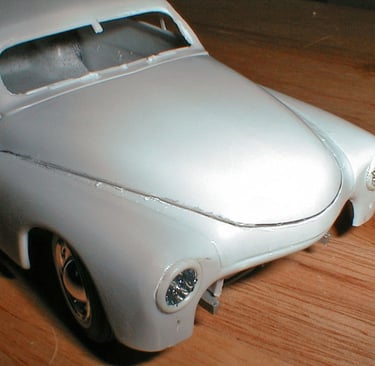
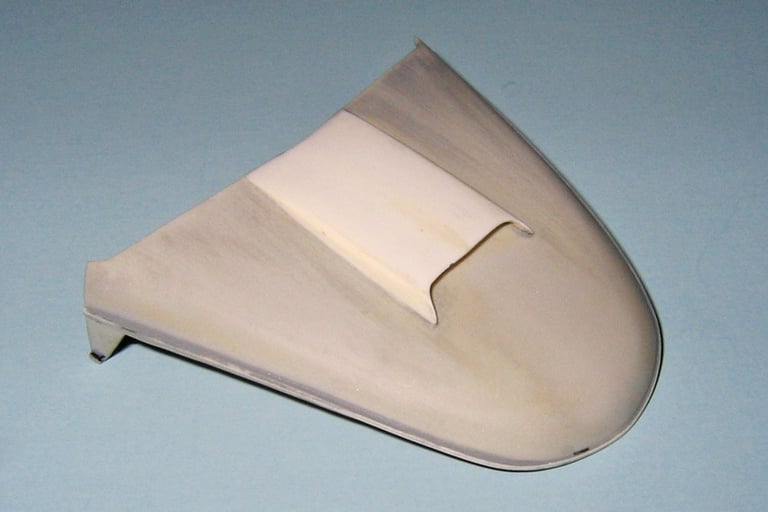
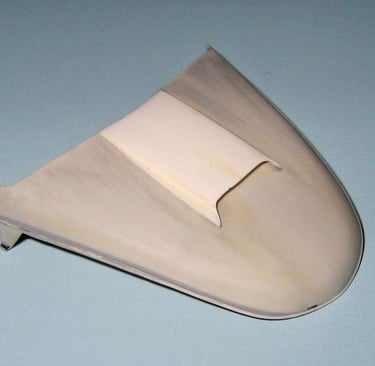
In keeping with the "lead sled" theme of the car, a pancaked hood was essential.
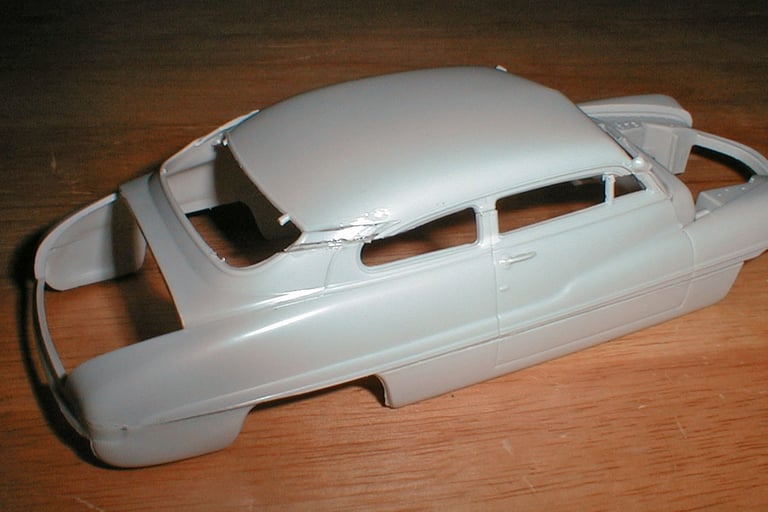
Here's the reworked hood, waiting for filler. Also note that the windshield posts are beginning to take shape. I also added the custom frenched headlight bezels from the kit.
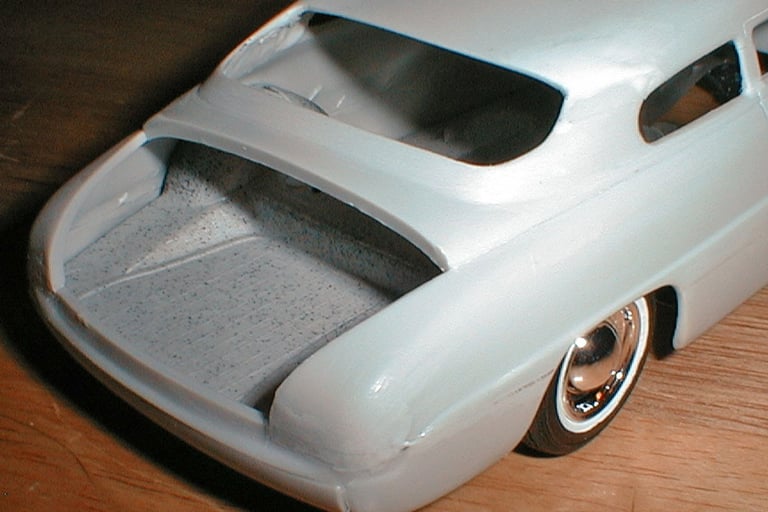
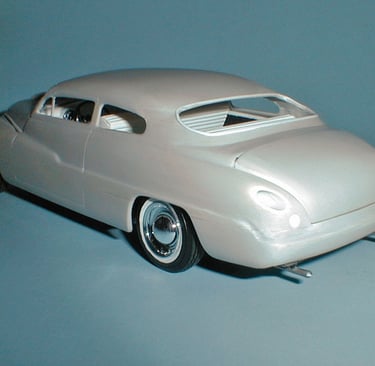
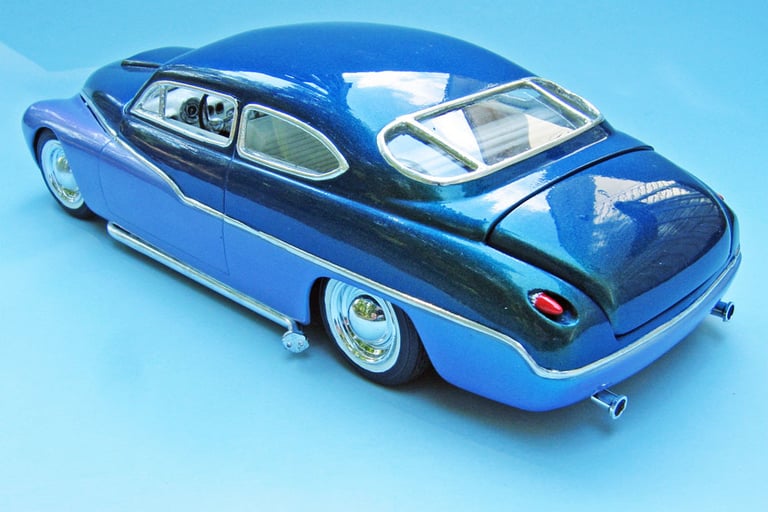
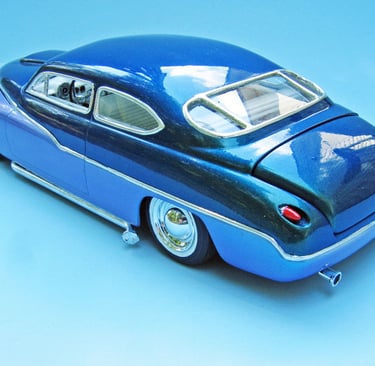
At the rear, the chopped top is beginning to take shape. The rear wheel openings have been radiused, rear window enlarged, taillight openings filled and the rolled pan is in place.
The custom taillight housings have been added here. I used tubular styrene and carefully drilled holes in the body of the correct diameter. Then I glued pieces of the tubular styrene in place and shaped it to fit the body contours.
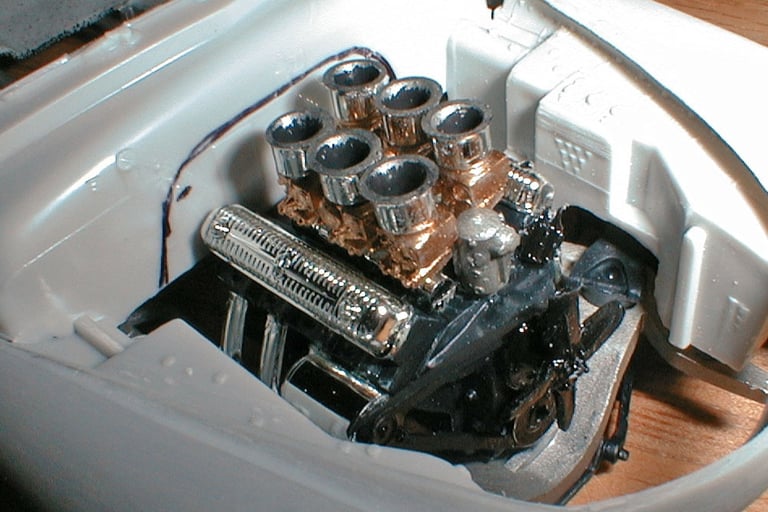
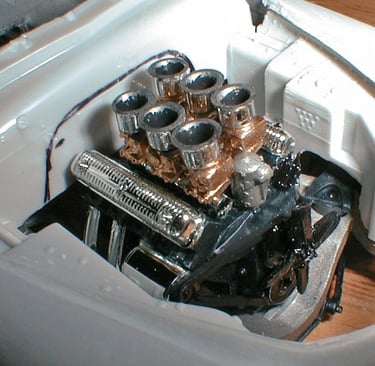
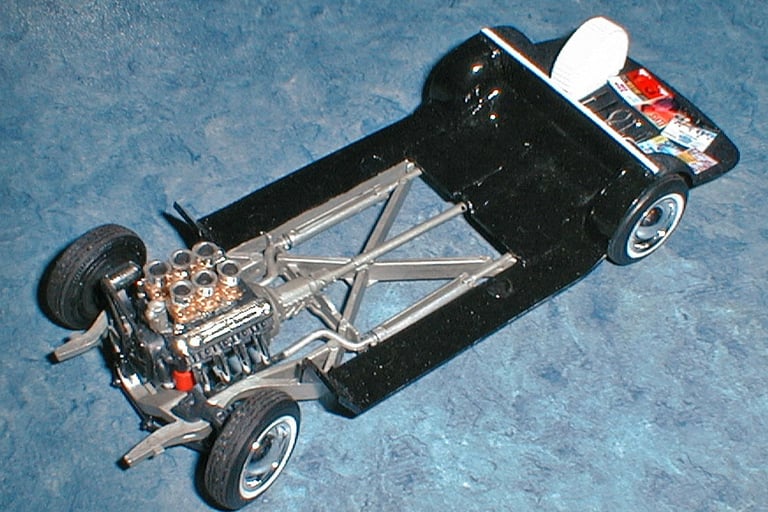
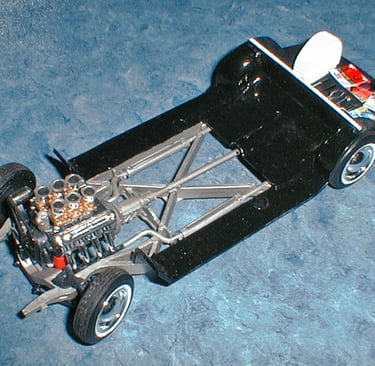
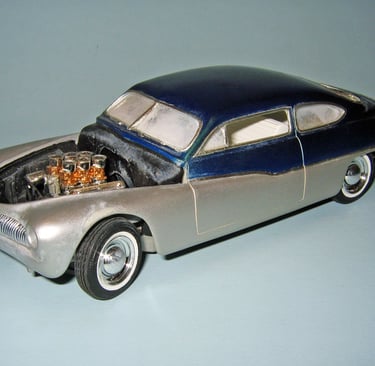
The Lincoln engine came from AMT's 1925 Model T kit. It was mated to the Merc's standard transmission.
I had to add a hood scoop to provide clearance for the top end of the engine.
Body work is still progressing at this point. This was a test fit of the body and chassis.
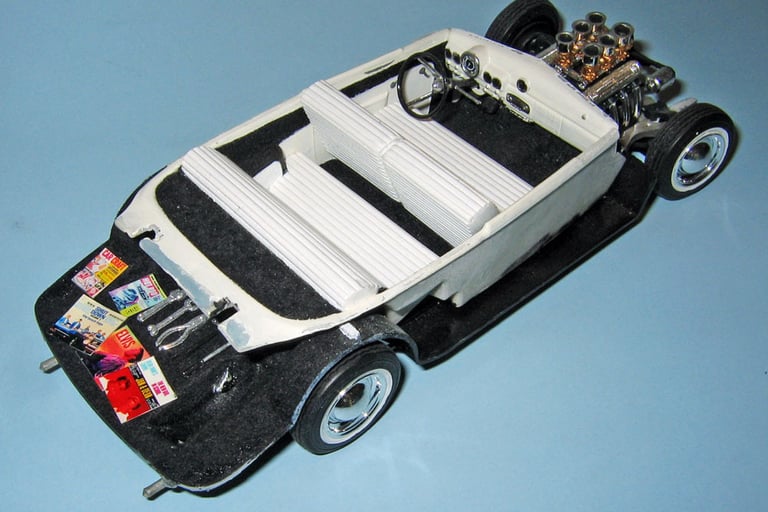
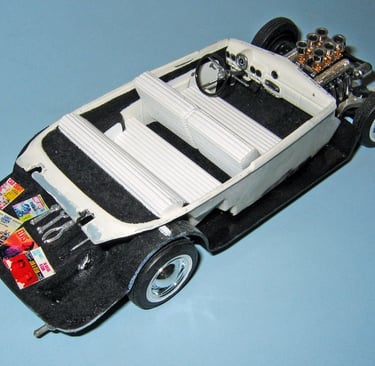
While the bodywork was underway, I built up the chassis, pretty much box stock.
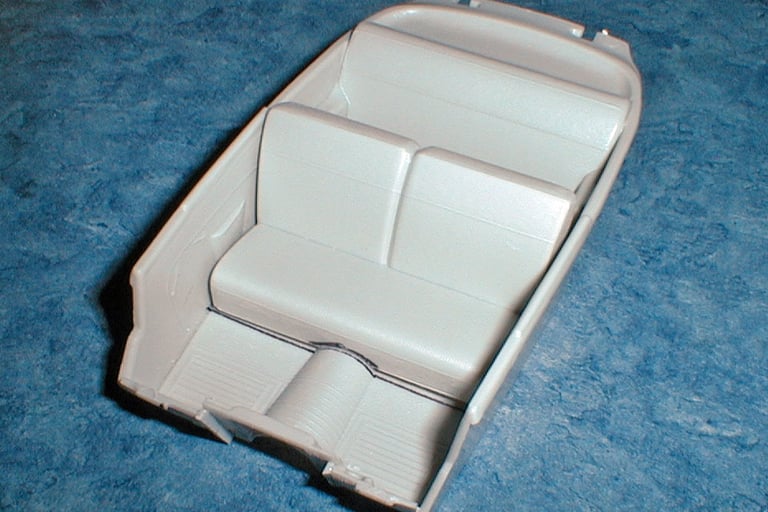
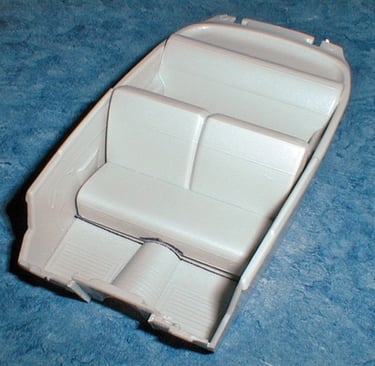
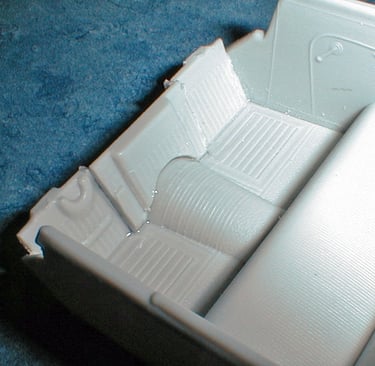
At this point it was time to start work on the interior. I carefully cut the side panels away from the interior tub and cut them down to fit the sectioned body. The front seat was also cut down and reshaped.
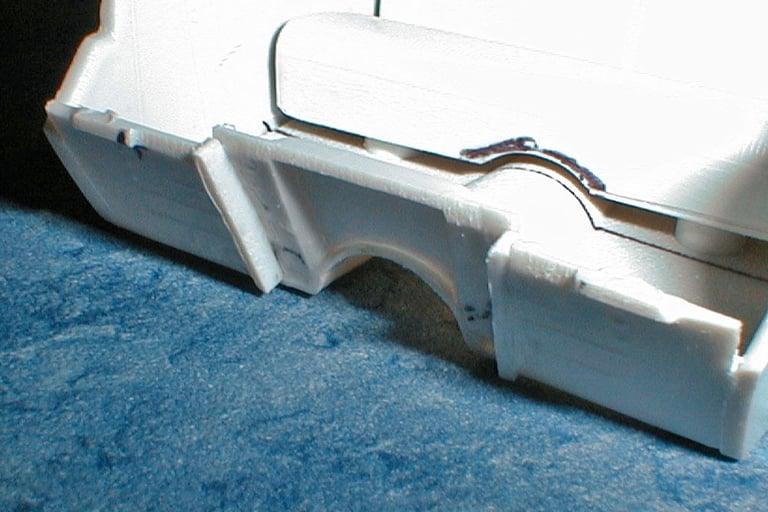
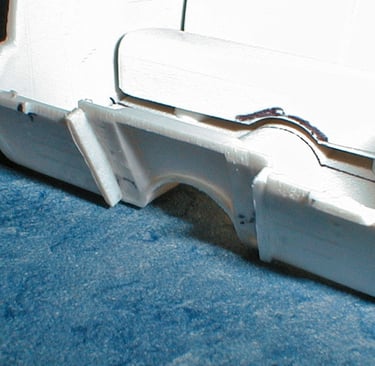
The front of the floor pan also had to be cut down and reshaped to provide engine clearance.
Here you can see how I recessed the center section of the floor pan to provide engine clearance.
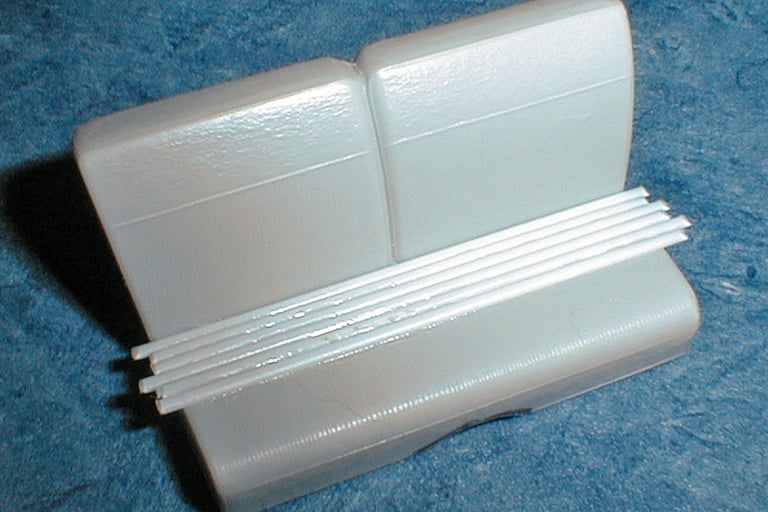
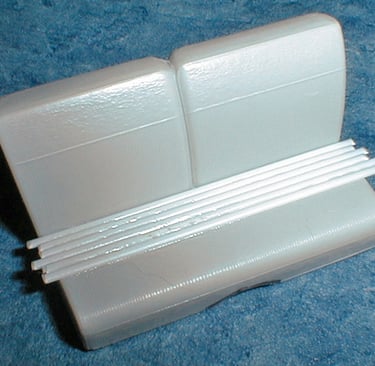
To simulate tuck 'n' roll upholstery I used strips of half-round styrene glued in place. Tedious, but well worth the effort.
This shows how the strip styrene was trimmed and shaped to fit the front seat.
Here's the finished interior.
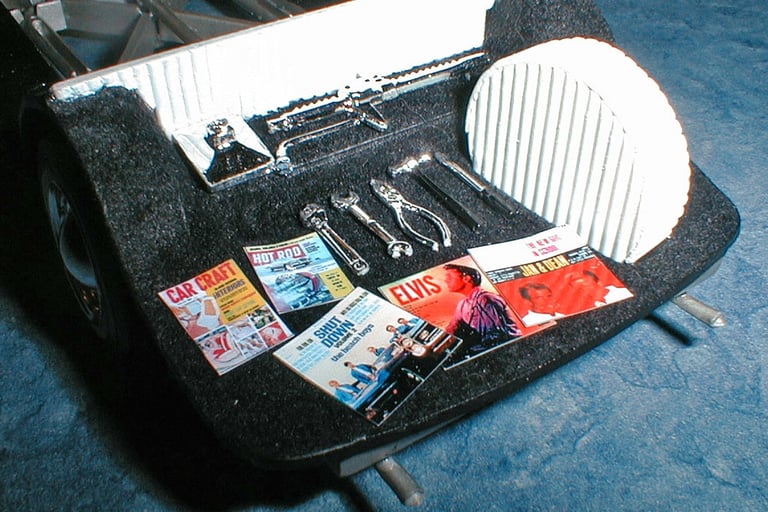
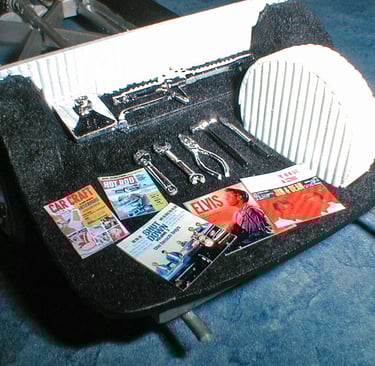
I added some photoreduced magazines and record album covers to the trunk area.
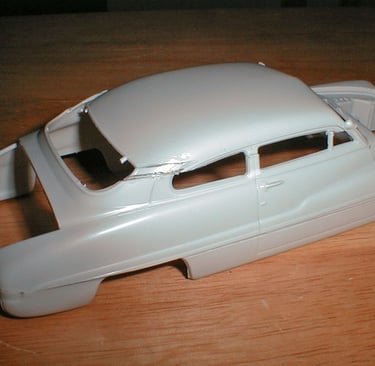
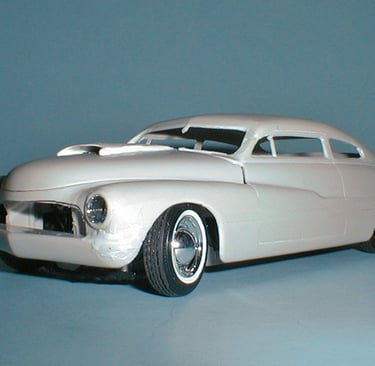
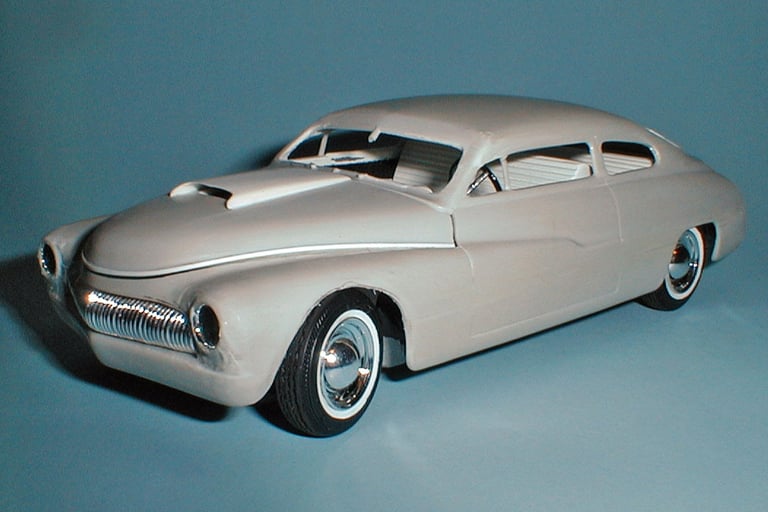
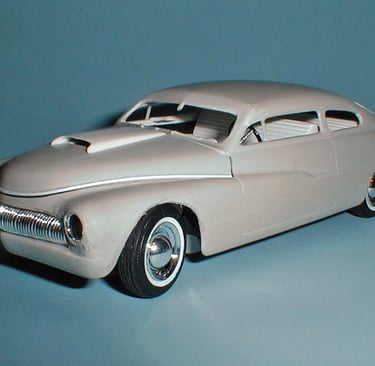
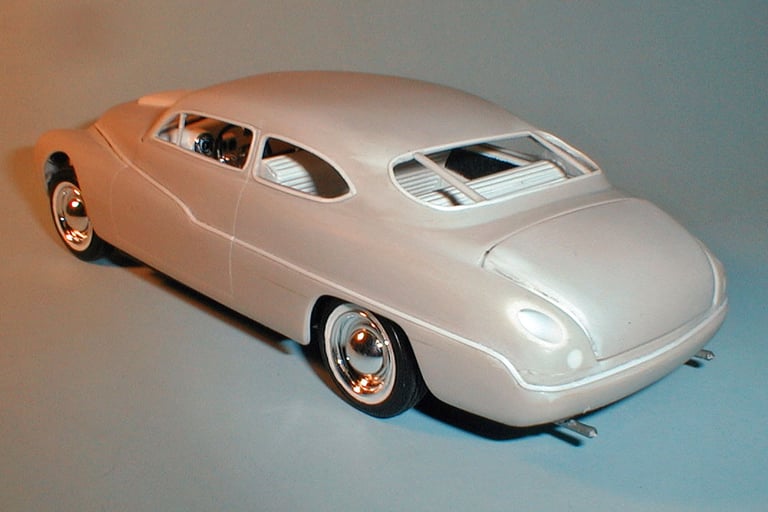
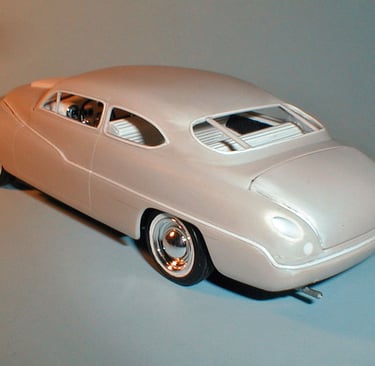
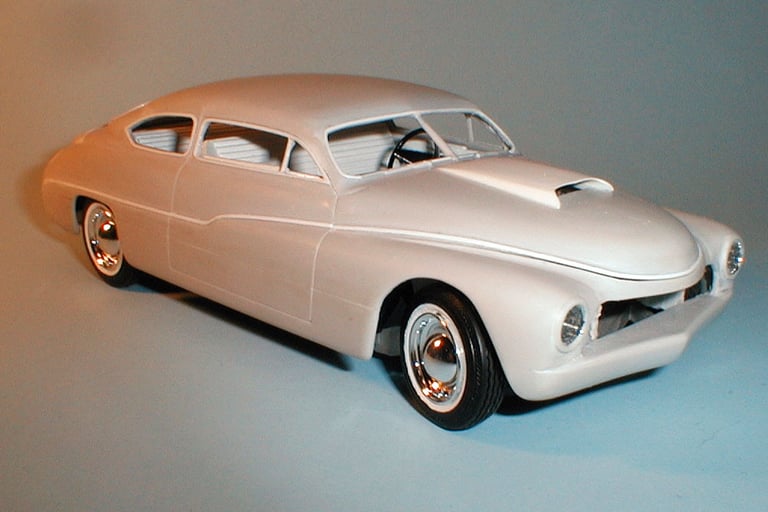
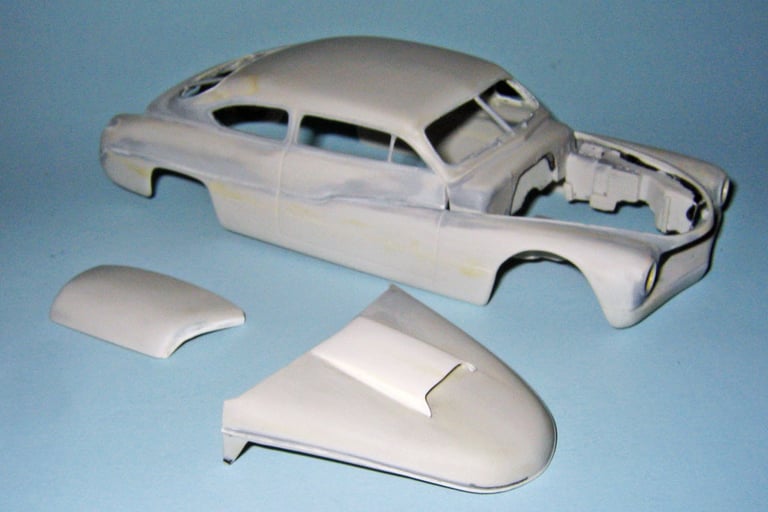
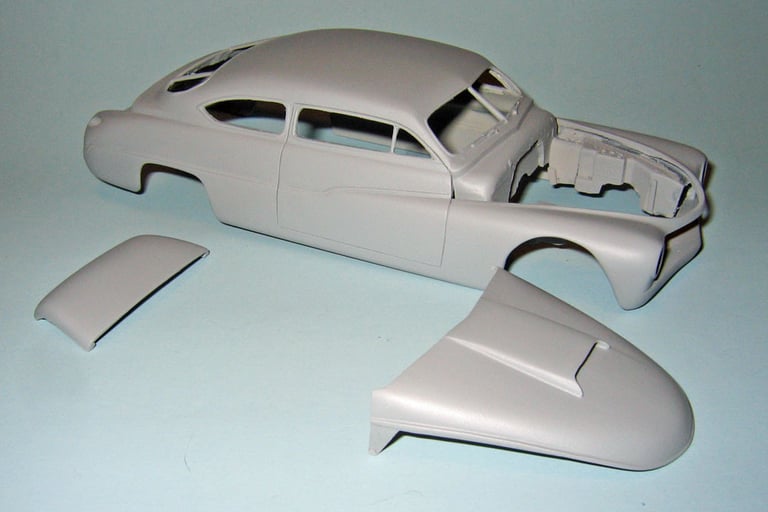
At this point the majority of the body work is almost done.
Just a little more sanding and shaping left to go.
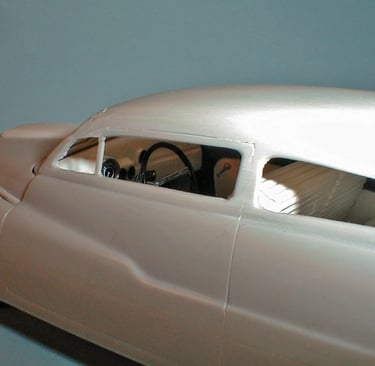
I had to do some reshaping of the window pillars.
The rear windows were also reshaped.
I also used very thin half-round styrene to simulate chrome trim on the body and around the windows.
Here you can see how I shaped the styrene "chrome trim" to fit the body contours.
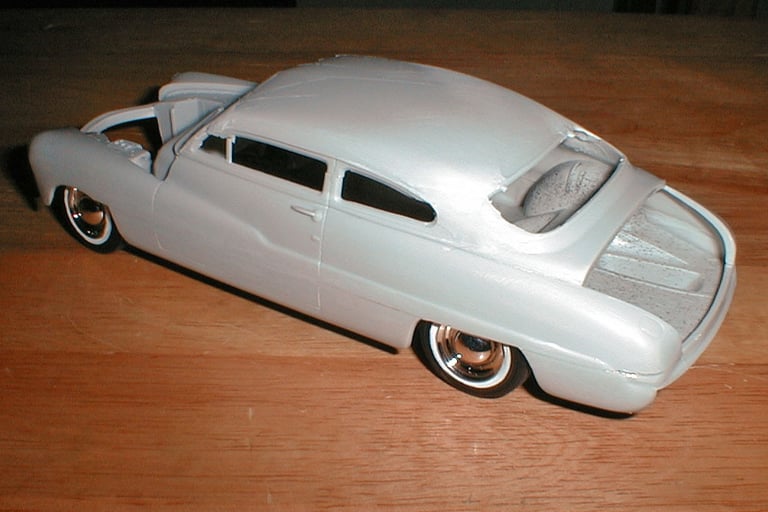
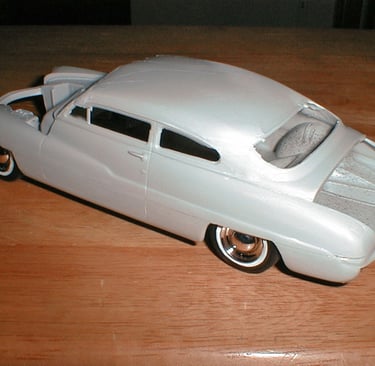
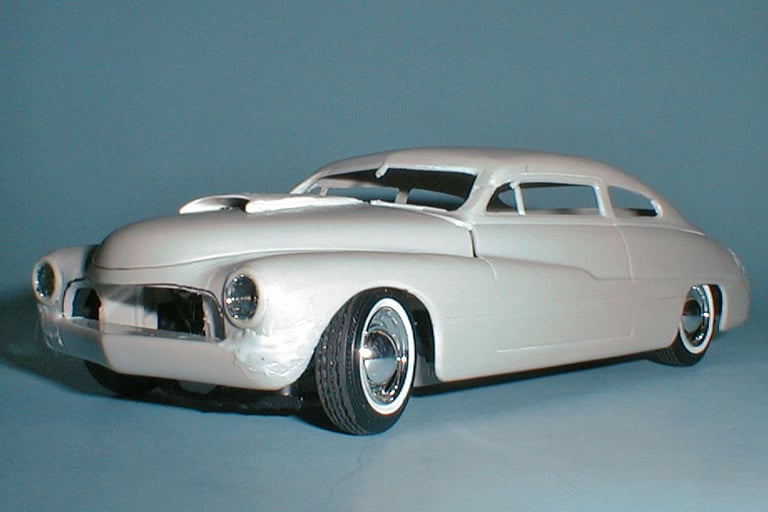
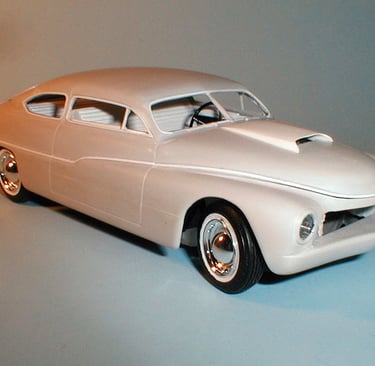
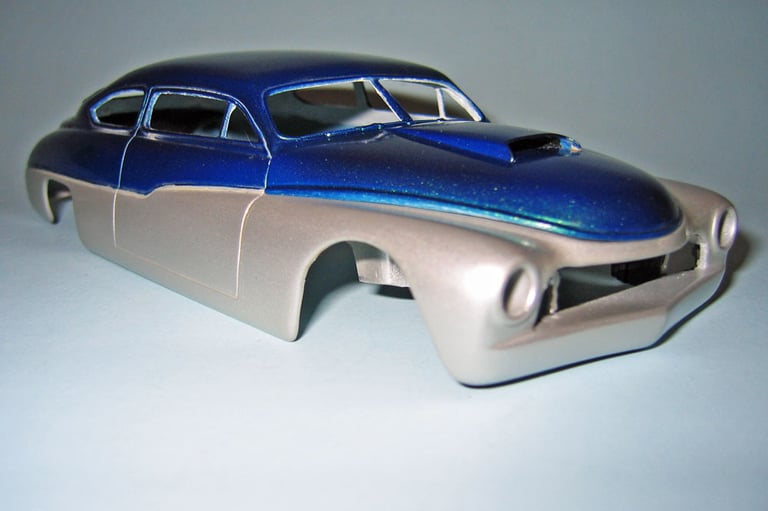
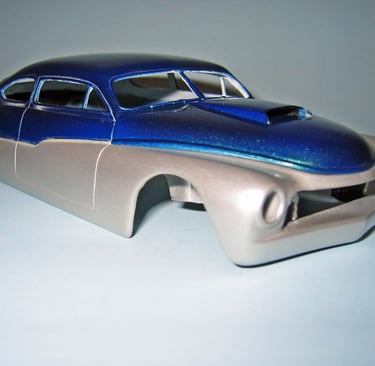
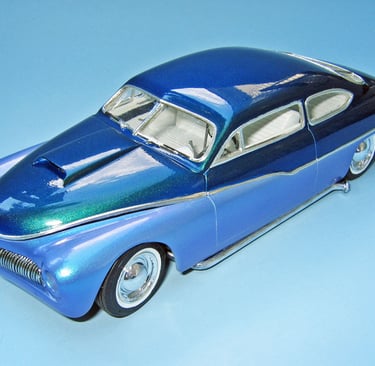
Bodywork is finished! Ready for primer.
Paint is finished here. I used two different colors of fingernail polish, applied with an airbrush.
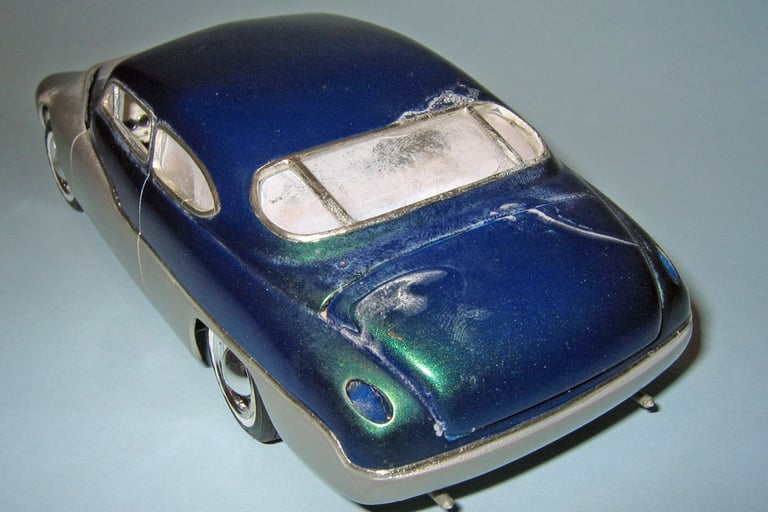
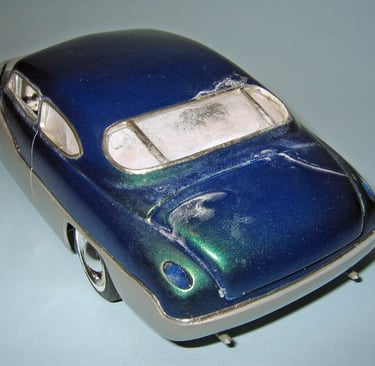
And then disaster struck!
I was using super glue to bond the interior to the body. It slipped and spilled and as you can see, seriously damaged the windows and the paint job.
So I had to strip the paint and start over. Fortunately I had used "sprue-glue" filler for the body work, so that didn't have to be redone. (I learned about sprue/glue filler on the Model Car List. Click here to learn more.)
Primer applied again... This did teach me a couple of lessons. The main thing was to not panic. I set the project aside for a while and then came back to it. Lots of times disasters can be salvaged.
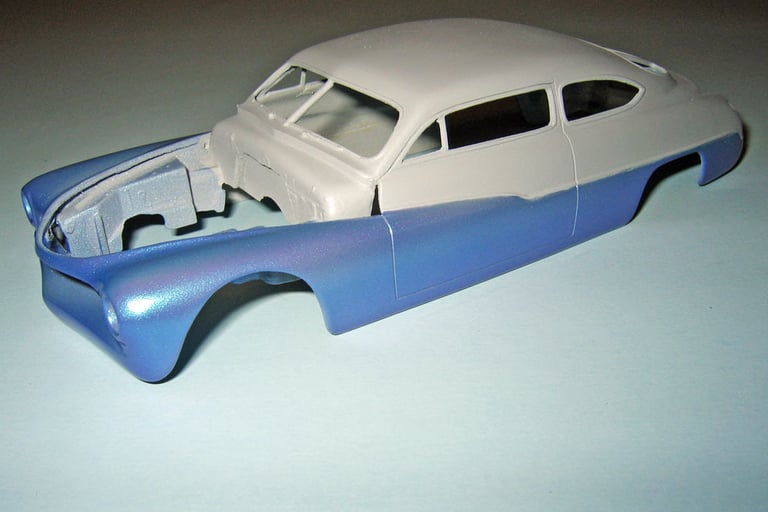
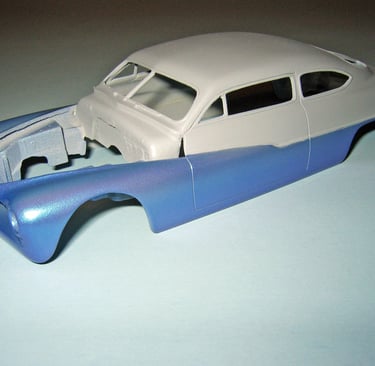
Starting to mask off the body again for reapplication of the two-tone paint job. I usually use masking tape to cover large areas and then liquid masking applied with a brush for smaller areas.
I decided for redoing the paint job to change the color combination. Here's the lower body painted with a silver-blue flip-flop fingernail polish.
The upper body color is also flip-flop fingernail polish in a blue-green metallic.
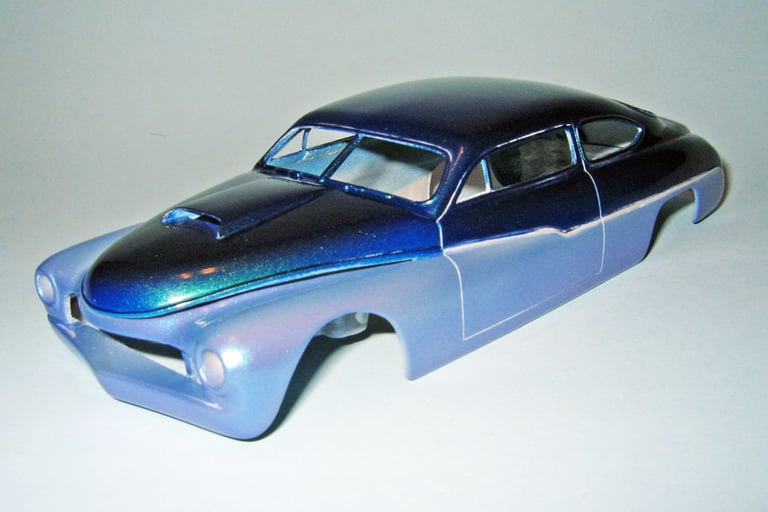
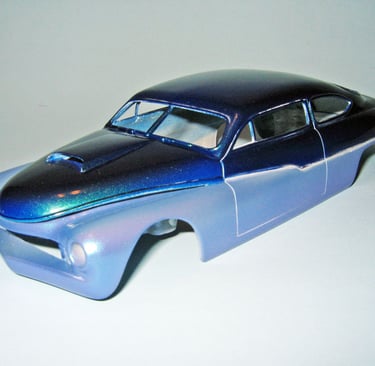
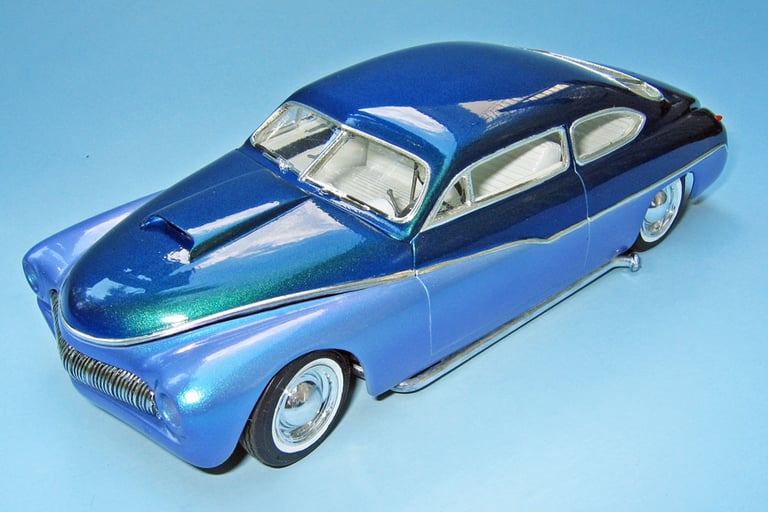
Finishing touches included reapplication of Bare Metal Foil on the chrome trim.
I added '59 Cadillac taillights, lake pipes and rear exhaust extensions.
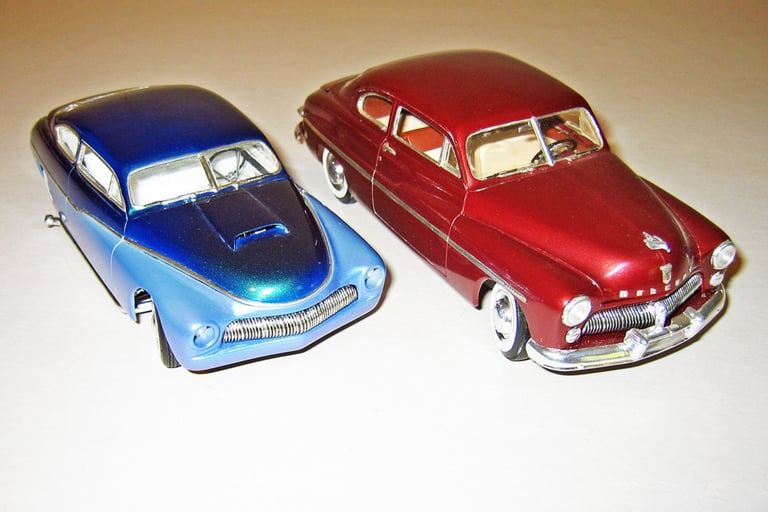
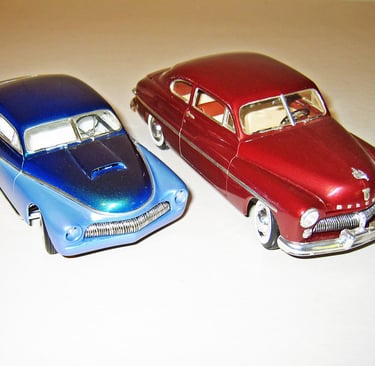
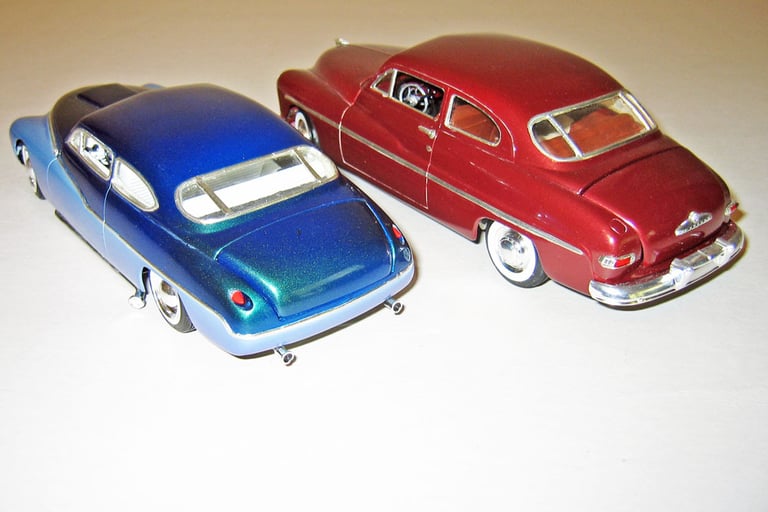
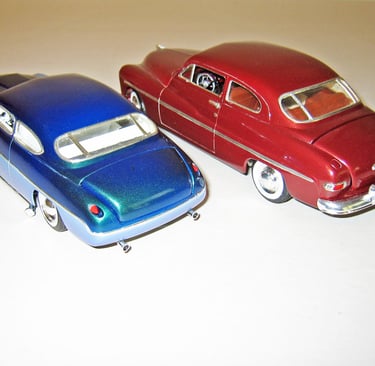
This is a side-by-side comparison, custom and stock versions of the same vehicle.
And a rear view of the finished project.